Car head restraint: how to adjust it properly and why it matters
Adjusting the head restraint takes a few seconds and matters for every occupant. We cover the adjustment order, height, distance, rear seats and mistakes worth avoiding.

Key points
The head restraint should be adjusted after the seat and backrest: its top edge should sit between the top of the head and eye level, and the gap to the head should not exceed 4 cm. It is a passive safety feature that helps limit backward movement of the head relative to the torso in a rear-end collision.
The quick answer: it is not a comfort support
To adjust a car head restraint properly, first adopt your driving position and adjust the seat and backrest. Then position the head restraint so that its top edge sits, according to DGT guidance, between the top of the head and eye level. In addition, the gap between the head and the head restraint should not exceed 4 cm.
It should not be treated as a simple accessory for resting the neck. The DGT classifies it as a passive safety feature. Its position changes when the driver changes, the backrest is reclined or a rear seat that is normally empty becomes occupied. It is therefore worth checking before setting off, especially in shared cars or before a trip.
Its purpose is not to promise complete protection either. In a rear-end collision, correct positioning helps limit backward movement of the head relative to the torso. If it is not positioned properly, the DGT warns that the cervical vertebrae may be injured.
Section references: DGT — El airbag, el casco, el reposacabezas ↗ · Euro NCAP Whiplash Test Protocol v4.1.1 ↗
- Adjust the seat and backrest first; adjust the head restraint afterwards.
- Position its top edge between the top of the head and eye level.
- Try to keep the distance between the head and head restraint to no more than 4 cm.
- Carry out the same check for every occupant, not only the driver.

What it helps do in a rear-end collision
In a rear-end collision, the body and head do not necessarily move in the same way. The functional principle set out by Euro NCAP is that the head restraint limits backward movement of the head relative to the torso of the seated occupant. This is why height and distance matter: it is not enough for the head restraint simply to be fitted to the seat.
The DGT links incorrect positioning to whiplash and possible cervical injuries. Correct adjustment does not by itself eliminate the consequences of an accident or replace the vehicle's other safety features, but it does avoid giving up the function intended for this component.
It is also useful to distinguish two concepts. Height describes where the head restraint sits relative to the head. Euro NCAP calls the horizontal distance between the front face of the head restraint and the rearmost point of the head backset. In an everyday check, this second variable means not leaving an excessive gap behind the head.
Section references: DGT — El airbag, el casco, el reposacabezas ↗ · DGT — Posición de salida ↗ · Euro NCAP Whiplash Test Protocol v4.1.1 ↗
- Height: the head restraint should cover a sufficiently high area of the head.
- Distance: it should be close to the head within the seat's available adjustment range.
- Position: its central area, which the DGT identifies as the strongest, should be behind the head and at eye level.
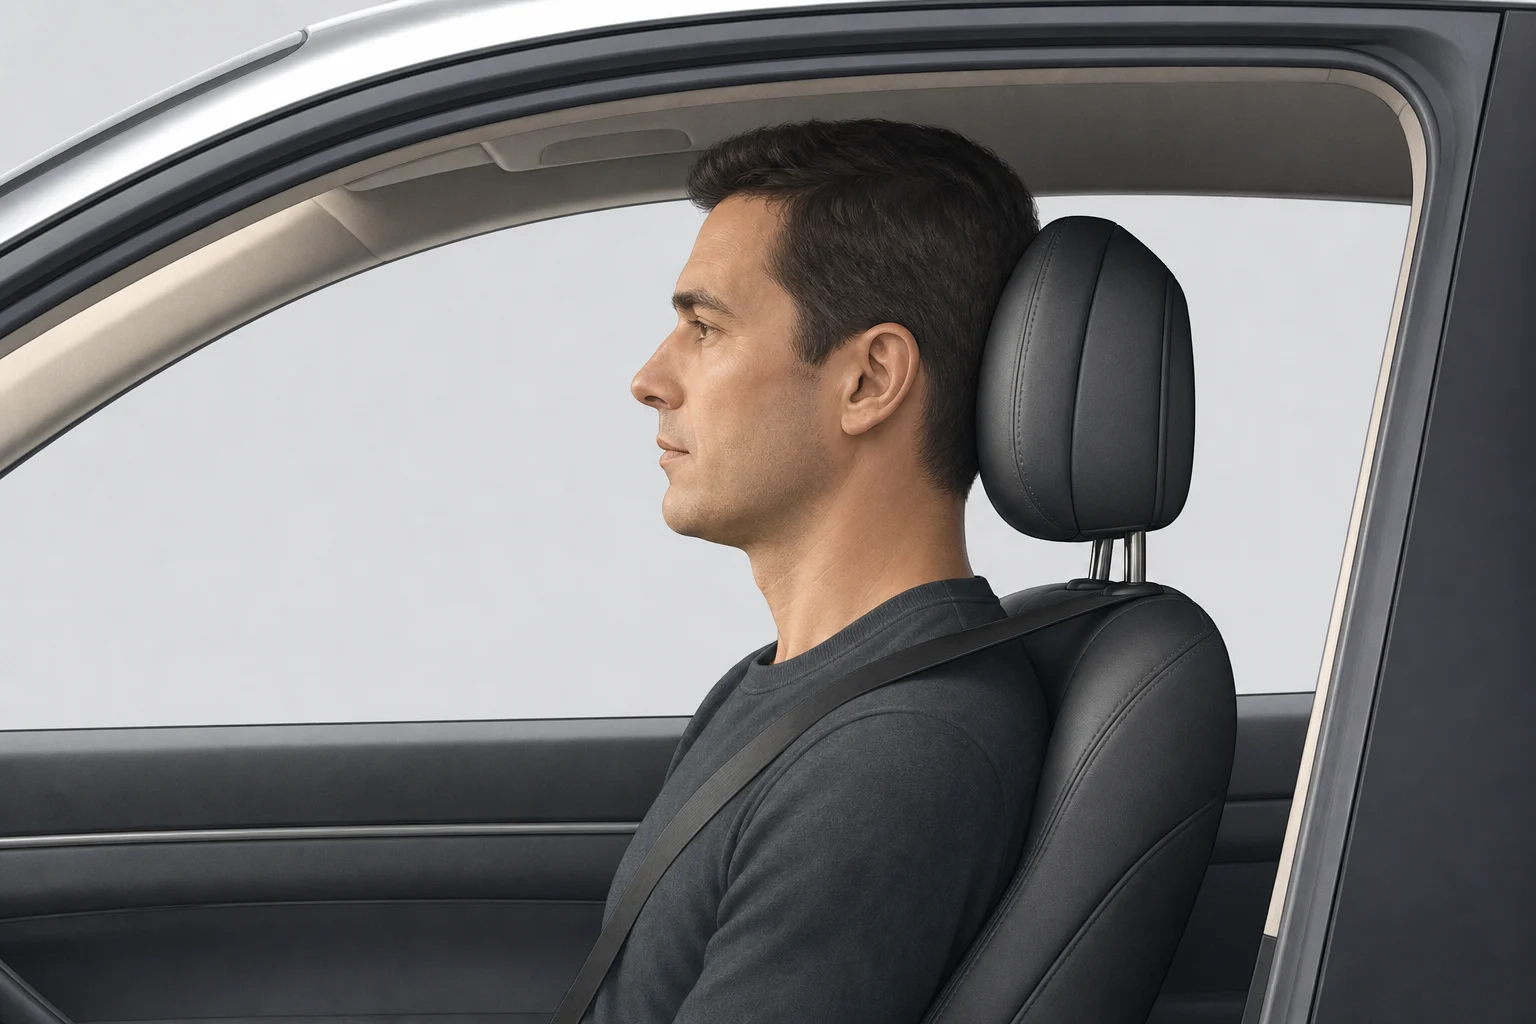
Adjustment order: seat, backrest and head restraint
The order prevents a common mistake: raising the head restraint and then changing your posture until it ends up too far away or too low. DGT guidance covers seat adjustment first—distance, height and recline—and places the head restraint afterwards. The final check should always be made with the occupant already seated in their actual travelling position.
A practical check is to sit as you will travel, look ahead and check the height. Then check that the head is close to the front surface of the head restraint. If the design allows recline or depth adjustment, follow the manufacturer's specific instructions; not all seats have these adjustments.
There is no single valid position for everyone. Height, posture and the design of each seat change the outcome. What remains the same is the principle: adjust the seat-and-backrest assembly before assessing the height and proximity of the head restraint.
Section references: DGT — El airbag, el casco, el reposacabezas ↗ · DGT — Posición de salida ↗
- 1. Sit in the position in which you will travel.
- 2. Adjust the seat and backrest according to the vehicle instructions.
- 3. Adjust the head restraint height.
- 4. Check that it is behind the head and as close as possible, using 4 cm as the maximum reference distance.
- 5. Repeat the process when the driver or occupant changes.
Adjustable, fixed, reactive or proactive: what changes and what does not
The system name should not make you forget the basic position check. Euro NCAP distinguishes between fixed or integrated head restraints and adjustable ones. A fixed or integrated restraint does not allow height adjustment and/or cannot be removed without tools or partial dismantling; an adjustable one can be positioned to suit the occupant's body dimensions.
The protocol also distinguishes reactive and proactive systems. Reactive systems improve head-restraint geometry during an impact through a mechanism usually activated by the occupant's mass. Proactive systems do so before an impact using sensors. These are technical definitions: the commercial name alone does not reveal how a specific seating position is adjusted or what position each person should use.
Consequently, an integrated head restraint does not mean seat posture can be ignored, and a system with an automatic mechanism does not replace the manufacturer's instructions. Euro NCAP provides for different categories and test positions depending on whether the restraint is fixed, adjustable or automatically adjusted.
| Type | What it indicates | What the occupant should do |
|---|---|---|
| Fixed or integrated | Does not allow height adjustment and/or cannot be removed without tools or partial dismantling. | Adjust the seat and check the resulting position relative to the head. |
| Adjustable | Can be positioned to suit the occupant's body dimensions. | Adjust the height and check proximity to the head. |
| Reactive or proactive | May improve geometry during or before the impact, depending on the system. | Maintain the position specified by the manufacturer; the system does not replace basic adjustment. |
Section references: Euro NCAP Whiplash Test Protocol v4.1.1 ↗
- Adjustable: allows its position to be adapted to the seated person.
- Fixed or integrated: may offer no height adjustment and may not be removable without tools.
- Reactive: changes its geometry during the impact.
- Proactive: may change its geometry before an impact using sensors.
Rear seats: check them before you leave
The check does not end with the front seats. The DGT specifically reminds users that head restraints must also be used in rear seats. This is particularly relevant when people of different heights travel, when adults use a seat that is usually empty, or when the cabin is reorganised for a family trip.
Before setting off, each passenger should sit down and check whether the head restraint reaches the appropriate height and sits behind their head. Where adjustment is available, it should be set for that occupant; where it is not, the backrest position will still be relevant when assessing the overall arrangement. Do not assume the setting left by the previous passenger will suit the next person.
This minute before departure is useful on long journeys, where changes of occupant and stops are more frequent. Making it part of the departure routine is a simple way not to leave passive safety until the last moment. General information about these features is available in the Safety section.
Section references: DGT — El airbag, el casco, el reposacabezas ↗ · DGT — Posición de salida ↗
- Check rear seats even if they are normally empty.
- Check the height for every passenger before a journey.
- Do not use the previous occupant's setting as an automatic reference.
- After changing the backrest position, check the head restraint again.
Mistakes to avoid and what to check in the handbook
The clearest error is having the head restraint too low, so that it is not at head height. Leaving a wide gap behind the head is another. Both mistakes can happen after moving the seat, reclining the backrest or sharing the car with someone else, so a quick visual check is more valuable than relying on the previous setting.
Do not remove the head restraint unless the vehicle handbook expressly provides for that operation and its refitting. The Toyota Proace handbook, for example, states that you must not drive with the head restraints removed and that they must be fitted and correctly adjusted. The exact procedure, locking mechanisms and fitting conditions depend on the vehicle.
Consult the handbook to identify permitted controls, confirm whether the head restraint is adjustable or fixed, and learn the instructions for removal and refitting. If the head restraint does not lock, its guides are damaged or the seat has defects that prevent it from being fitted and adjusted correctly, do not force the mechanism: follow the manufacturer's instructions and arrange a professional inspection.
Section references: DGT — El airbag, el casco, el reposacabezas ↗ · Euro NCAP Whiplash Test Protocol v4.1.1 ↗ · Toyota Proace Owner’s Manual ↗
- Do not keep it low just because it feels more comfortable.
- Do not leave an excessive gap between the head and head restraint.
- Do not remove it as a matter of habit or add items that prevent its intended position.
- Check that it remains fitted, positioned and adjusted correctly.
- If there is damage or it does not lock, do not improvise a repair.
What height should a car head restraint be?
According to DGT guidance, its top edge should sit between the top of the head and eye level. Its central area should also be behind the head, approximately at eye level.
What distance should there be between the head and the head restraint?
The DGT states that the gap should not exceed 4 cm. Euro NCAP calls the horizontal distance between the front surface of the head restraint and the rearmost point of the head backset.
Do you need to use head restraints in rear seats?
Yes. The DGT states that head restraints must also be used in rear seats. It is advisable to adjust them whenever the occupant changes or the seat position is altered.
Can I remove the head restraint while travelling?
Only if the vehicle handbook provides for that operation and explains how to refit it. As an example, the Toyota Proace handbook states that you must not drive with the head restraints removed and that they must be fitted and correctly adjusted.